TypedCMS Development with Laravel
Introduction
TypedCMS' use of JSON:API specification compliant APIs make it really easy to integrate into any new or existing Laravel project.
The TypedCMS Starter Kit for Laravel is the perfect kick start to your implementation, whether for an existing project or brand new one. Our stater kits are tailored solutions for each platform, unlike the simple API wrappers offered by other vendors.
Our Laravel kit provides Eloquent like models, repositories, query caching and a simple mechanism for adding custom webhook controllers and handlers.
GitHub Repository: https://github.com/TypedCMS/laravel-starter-kit
Quickstart Guide
Requirements
- PHP 8+
- Laravel 9+
Add TypedCMS to Your Application
The TypedCMS Starter Kit can be installed in under 5 mins, the only prerequisites are that you have a TypedCMS account with an OAuth Client Application configured.
Install the Starter Kit
First, install the package via the Composer package manager:
composer require typedcms/laravel-starter-kit:^2.0.0This package will automatically register its service provider.
To publish the config file please run:
php artisan vendor:publish --provider="TypedCMS\LaravelStarterKit\Providers\StarterKitServiceProvider"Connect to TypedCMS
To connect, you'll need an OAuth Client Application registered in TypedCMS.
Open your TypedCMS config file and set the client_id and client_secret to match your client application in TypedCMS. The redirect_uri should point to the display-code route provided by this package. If you’re using php artisan serve, this will be something like http://localhost:8000/display-code. If you need access to the management API, be sure to update the scope too. Leave the authorization_code for now.
Now run:
php artisan typedcms:connectYou’ll be asked for your client credentials, however you should see that they have been pre-filled, so you can just press enter to skip through these until you’re given an authorization URL. Open this link in your browser and click the Authorize button, ensuring you're authorising the correct account. Copy the code displayed on the screen (Ctr+A then Ctr+C to make sure you get it all). Paste this code into the terminal where prompted. If it is verified successfully, you can now paste this code into the authorization_code property of your config file.
That's it! You're now connected to TypedCMS and ready to start interacting with our APIs.
Accessing Your Content
To start interacting with your content, first you need to create a repository in your project.
Assuming you have a blueprint called page with a pages collection, you can create a repository by running:
php artisan typedcms:make:repository PagesRepository --blueprint=page --collection=pagesThese repositories will be your primary means of interacting with the TypedCMS APIs.
Generated repositories will be placed in the app/Repositories directory of your application.
A generated repository will look something like this:
<?php

declare(strict_types=1);

namespace App\Repositories;

use TypedCMS\LaravelStarterKit\Repositories\ConstructsRepository;
use TypedCMS\LaravelStarterKit\Repositories\Contracts\Cacheable;

class PagesRepository extends ConstructsRepository implements Cacheable
{
    protected string $collection = 'pages';

    protected string $blueprint = 'page';

    /**
     * When this repository's cache is cleared, repositories listed here will
     * also be cleared.
     */
    protected array $clears = [];

    /**
     * By default, repositories make requests to the delivery api. Set this to
     * true if you wish to use the management api by default.
     */
    protected bool $mapi = false;
}
You can request a page from your pages repository like this:
<?php

namespace App\Http\Controllers;

use App\Repositories\PagesRepository;
use Illuminate\Contracts\View\View;

class PageController extends Controller
{
    public function __invoke(PagesRepository $repo, string $identifier): View
    {
        $page = $repo->findOrFail($identifier)->getData();

        return view('pages.show', compact('page'));
    }
}
That's it! You are now able to fetch content from TypedCMS.
Next Steps
Now that you have the basics, it would be a good time to checkout the starter kit documentation and the API references. TypedCMS' content modelling system lets you design pretty much anything you can imagine. Have fun!
Designing a Pages System
The most basic content type for most web projects is pages. In this guide we'll design a simple pages system using TypedCMS blueprints. To follow this guide you'll need a TypedCMS account and a project where you have a team architect or administrator role. Let's get started!
Start with a Blueprint
The first step to creating any content type in TypedCMS is a Blueprint. A blueprint is exactly what it sounds like, a model for your new content. From your projects sidebar, expand Architecture, click Blueprints and then click New Blueprint. Let's name our new blueprint ‘Page’ and then click Create Blueprint.
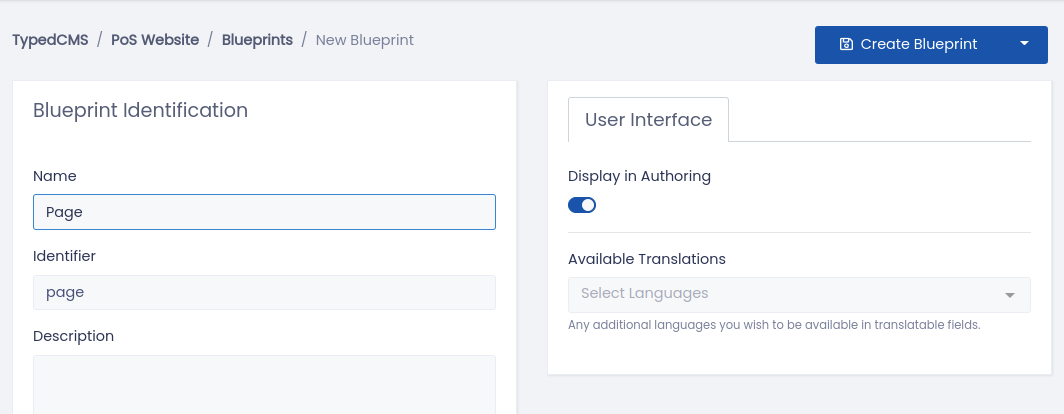
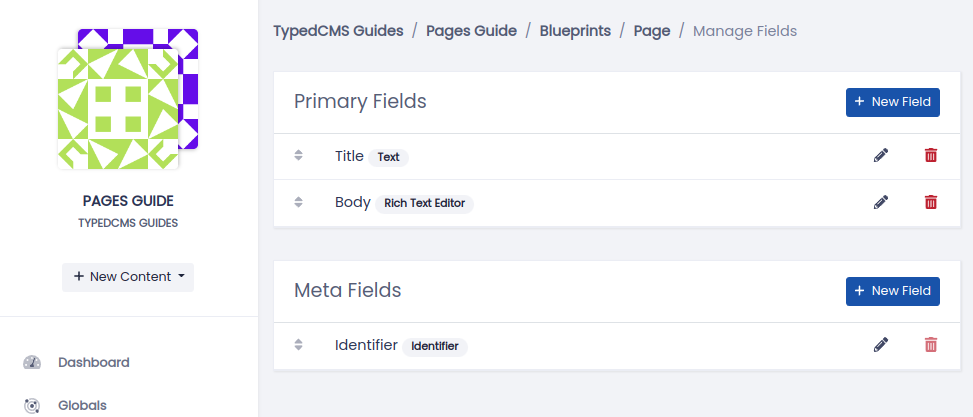
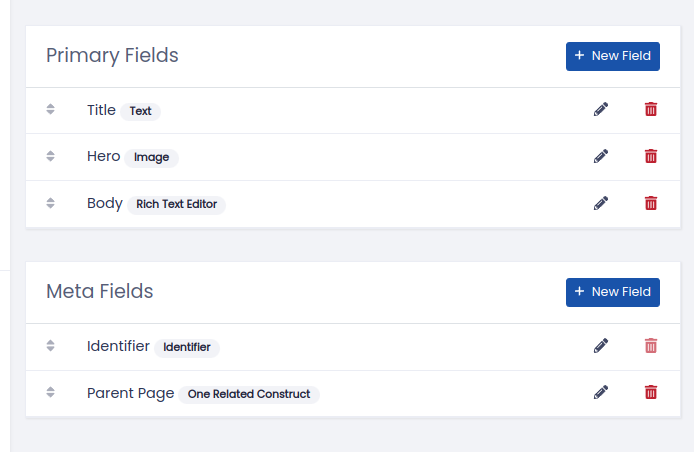
Once created, you will be shown your new blueprint's fields. These represent the data that makes up a ‘Page’. By default a new blueprint will include a unique identifier field, a title field and a body field. The ‘Identifier’ is already pre-configured to be auto-generated from the ‘Title’.
Add Some Fields
This is probably enough for the most basic of pages systems, but we'll add a little extra. Our pages will have a hero image and breadcrumbs. To achieve this we'll need an image field for our hero and we'll use a relationship field to set the parent page for our breadcrumbs.
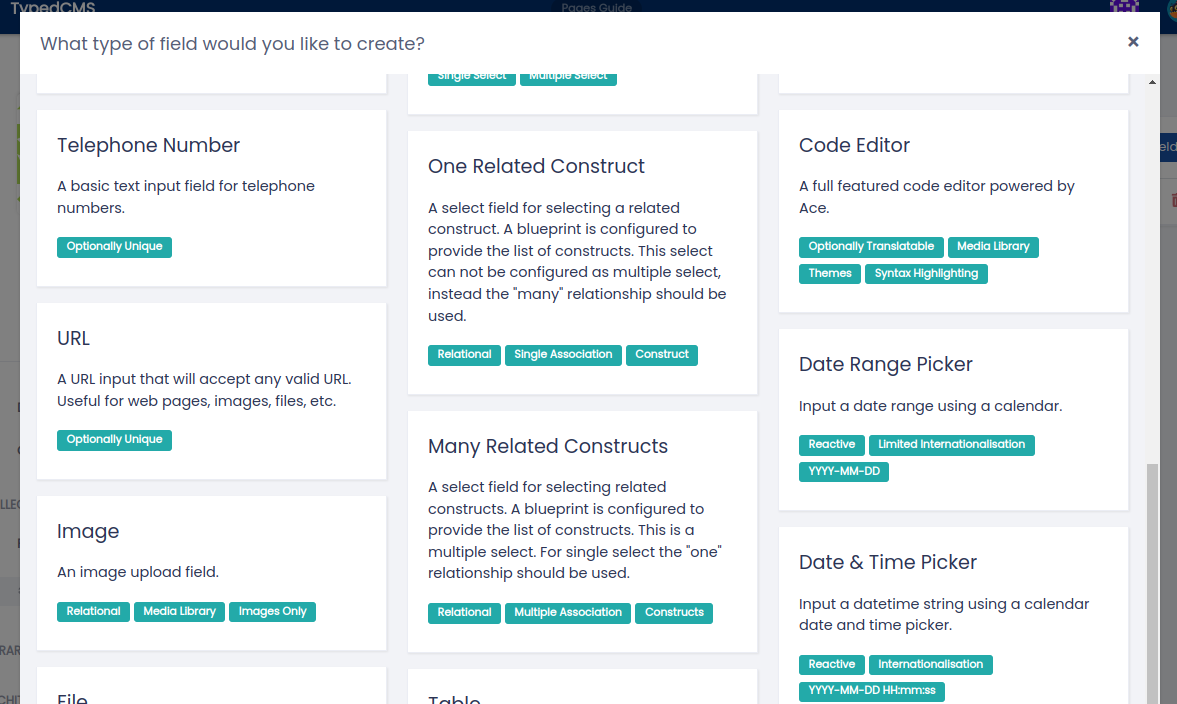
Let's start with the hero image. Click New Field and select Image from the list of field types presented.
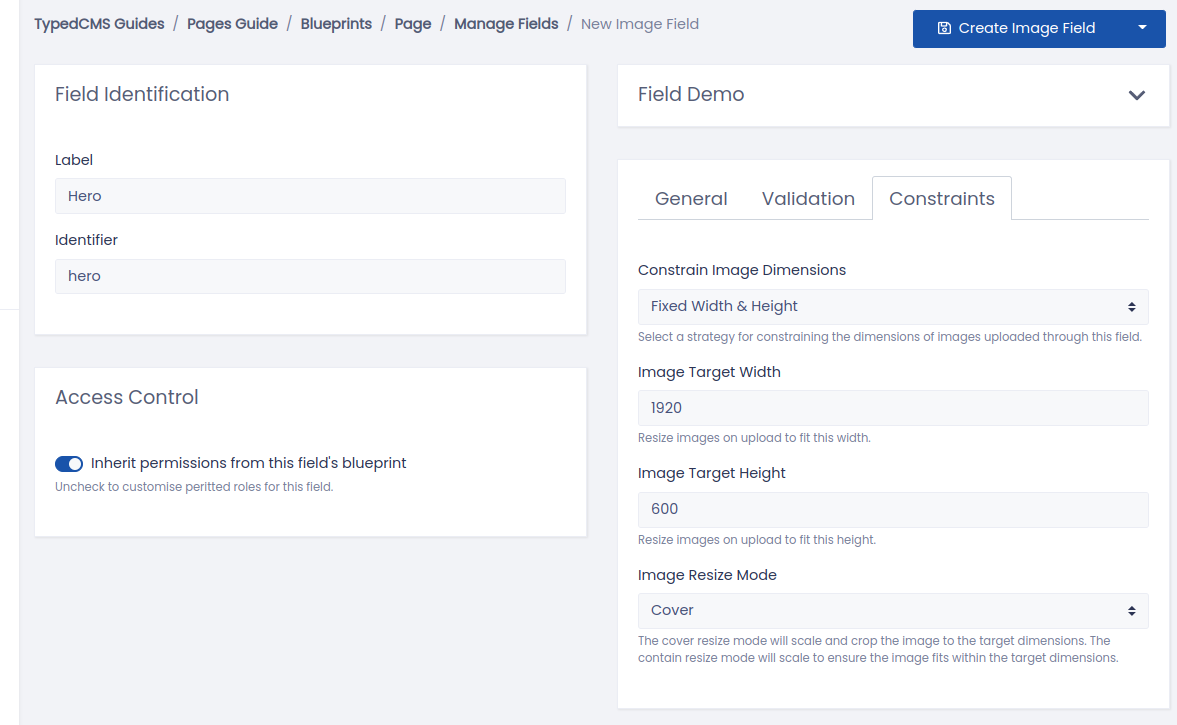
We'll call this field ‘Hero’ and in the Validation tab, set it as a Required Field. We want our hero image to be constrained to a certain size, so we'll configure this in the Constraints tab. From the Constrain Image Dimensions drop-down select ‘Fixed Width & Height’. You'll now see three more drop-downs, target width, target height and a resize mode. For our hero image we'll use ‘1920’, ‘600’ and ‘Cover’ for a full-width, short hero with auto-cropping. Finish by clicking Create Image Field.
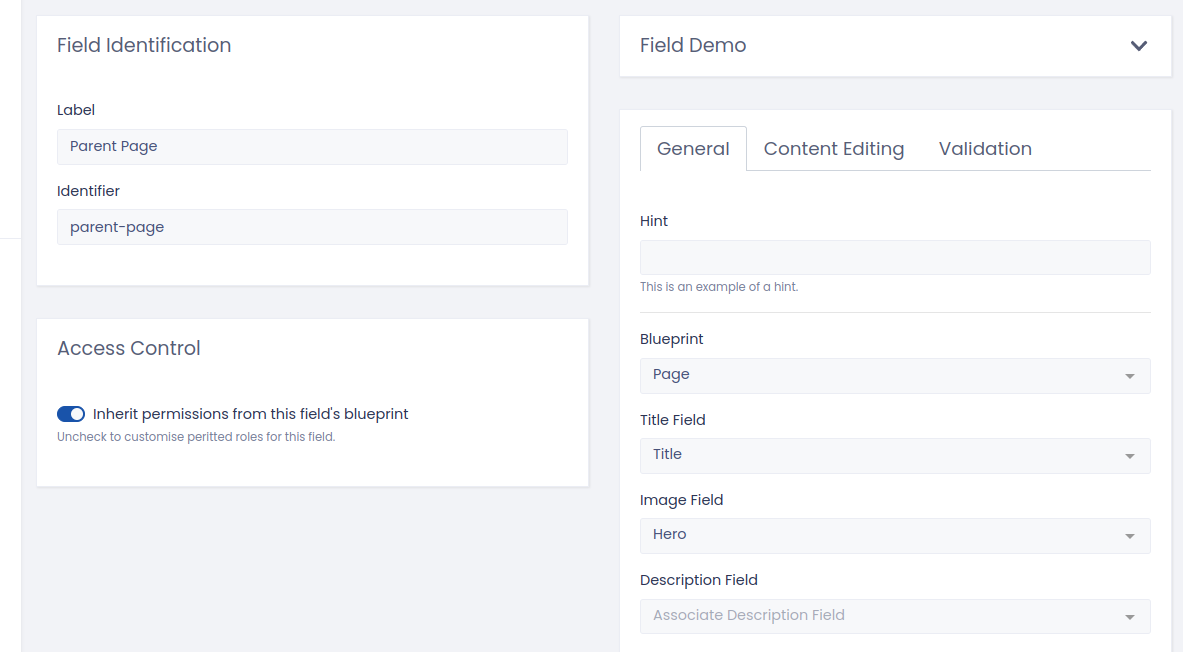
Next let's create a relationship field. Same as before, Click New Field, but this time select One Related Constructs from the list of field types presented. TypedCMS uses the term Constructs to describe things constructed from blueprints, in other words your content.
We'll call this field ‘Parent Page’ and in the set the Blueprint field to associate our ‘Page’ blueprint. We can now select a Title field and an Image field. We'll set these to ‘Title’ and ‘Hero’ respectively. The content of these fields will be shown when associating a parent page - we'll see an example of this later. Click Create One Related Construct Field to finish.
At this point you may want to rearrange your fields into your desired order.
Create a Page
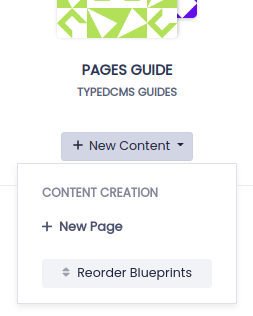
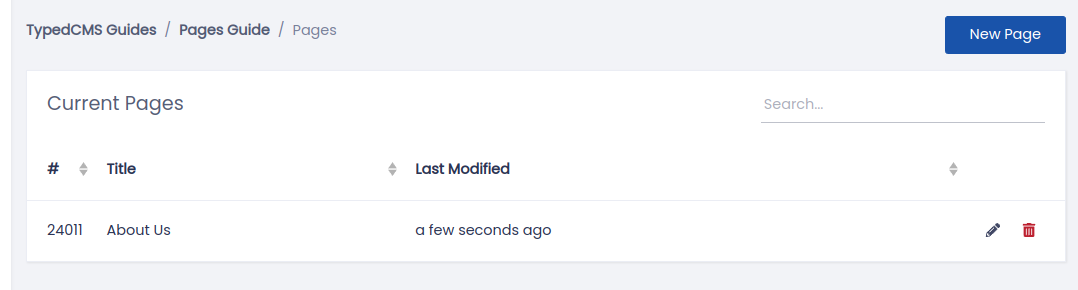
Now that we have a blueprint, we can create our first page. In the project sidebar, Click New Content and you now have a New Page option - click it!
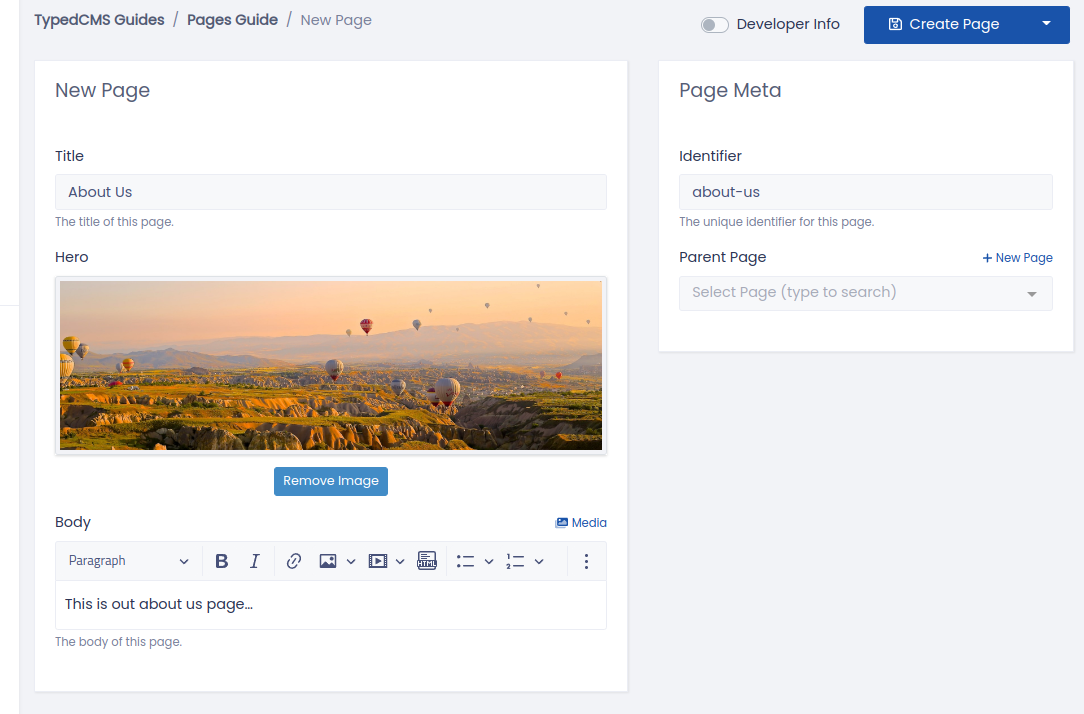
We'll call this new page ‘About Us’ and throw in some content. Once you're done click Create Page.
A Collection of Pages
Having saved the page you will be returned to a list containing only your new ‘About Us’ page. This is your Default Collection for the ‘Page’ blueprint; it was created automatically for you.
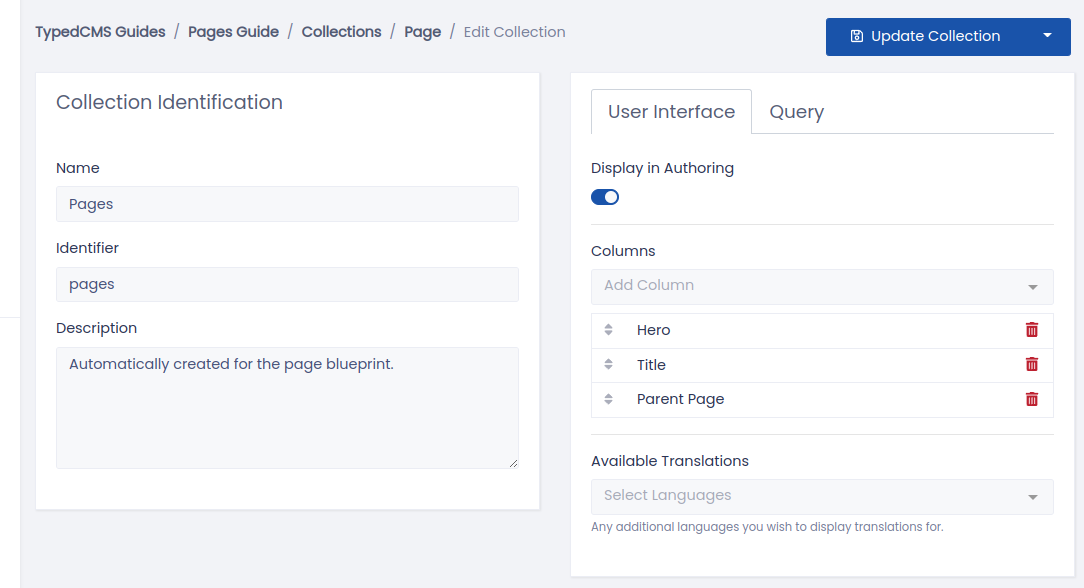
It's a bit bland though, so let's make it a bit fancier. In the project sidebar, head to Architecture → Collections and click the pencil next to your ‘Pages’ collection. As you can see, from here you can add columns and customise sorting and filtering options.
Let's add some more columns! From the Columns drop-down we'll add our ‘Hero’ and ‘Parent Page’ fields. Finally click Update Collection to save these changes.
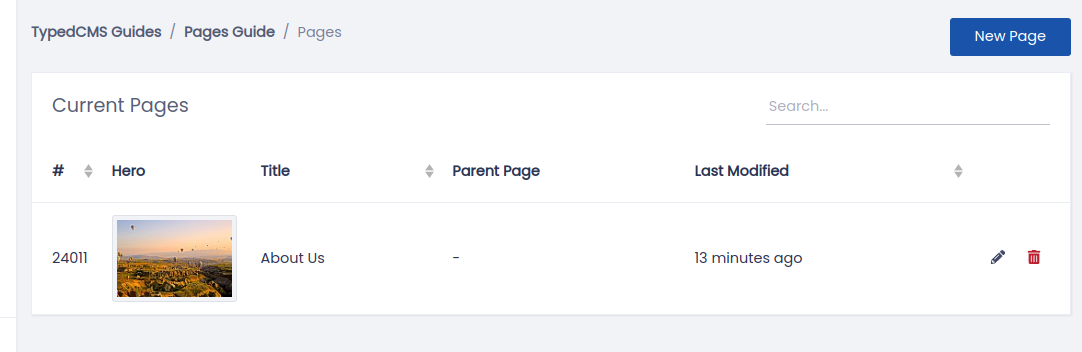
To return to your ‘Pages’ collection, from the project sidebar navigate through Collections → Pages. You'll now be presented with a much nicer list of pages.
Form a Relationship
That's pretty much the basics of pages, but, before we finish up, let's create a relational page. Same a before, click New Page to get started. We'll call this page ‘Our Team’, add some content and set the Parent Page to ‘About Us’. Click Create Page.
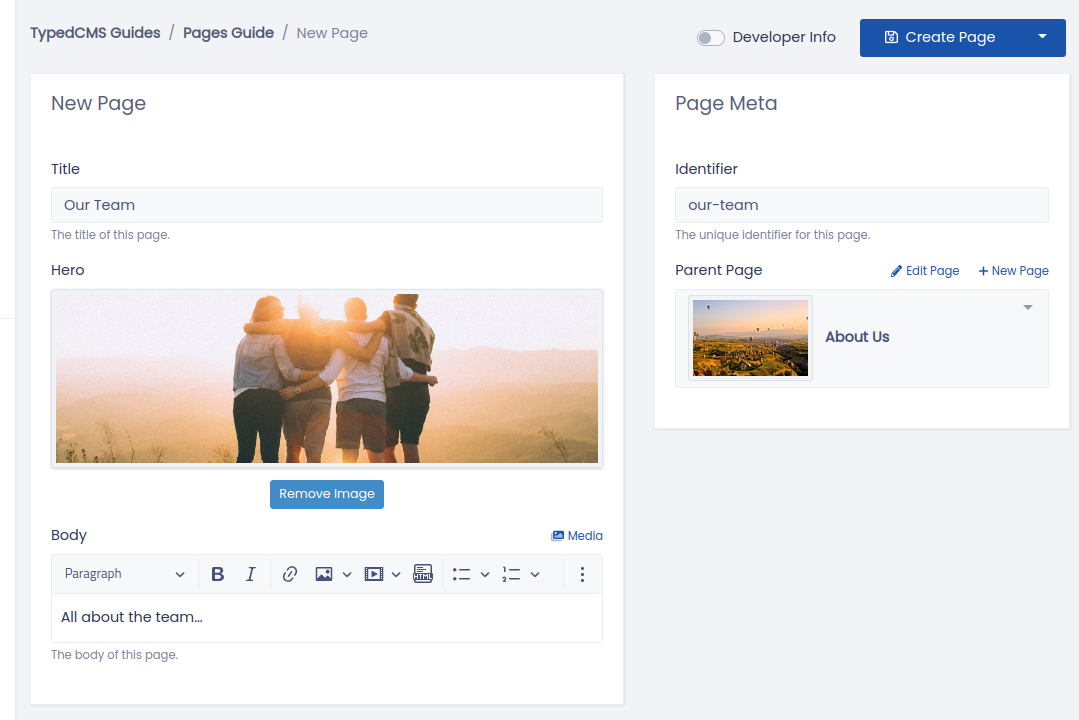
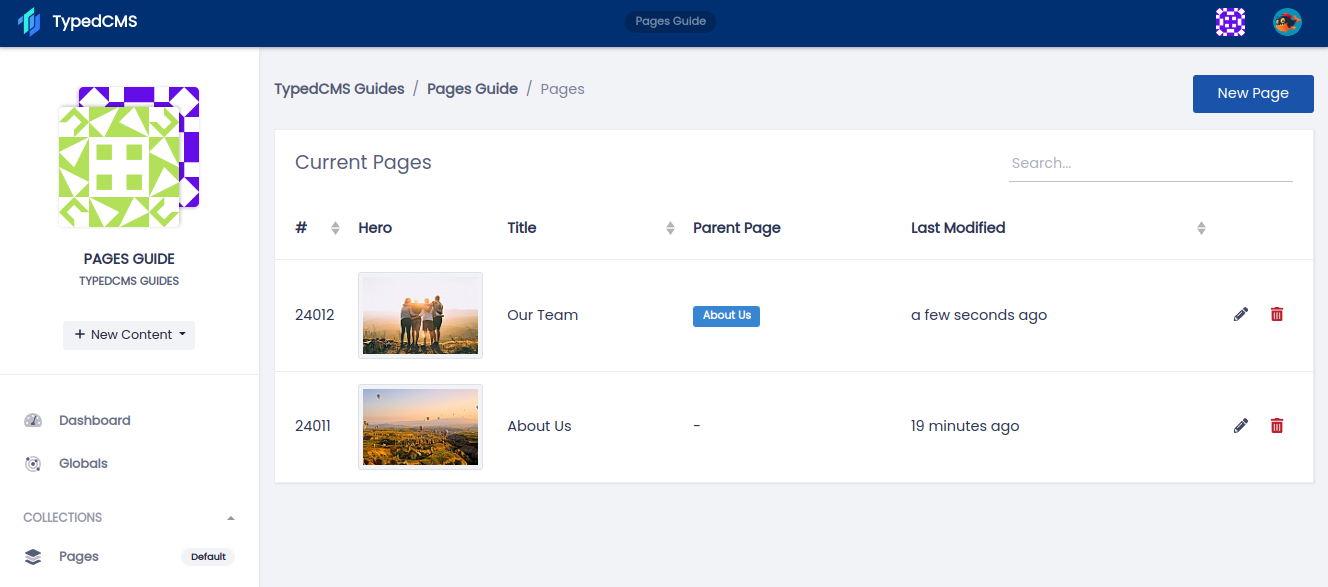
Done! A simple relational pages system. Using these basic building blocks, you are now free to imagine even more awesome blueprints.
Image Gallery


